Sunday, March 20, 2011

Braised Rabbit with Olives, Capers, and Potatoes


We were lucky enough to come into possession of 5 rabbits this week. Here is the first of several attempts to cook rabbit. This round went really well.

Ingredients

1 rabbit, cut into 8 pieces (10 if you have the belly)
6 Tbs of olive oil
1 lb of red skinned potatoes, cut into 1 in pieces
1 red onion, thinly sliced
2 bell peppers, cut in the thin strips (I used red and orange)
2 medium tomatoes, diced
2 celery stalks, thinly sliced
1 1/4 cup sliced Sicilian green olives
1/3 cup capers, drained
1/2 tsp dried thyme
1/3 cup apple cider vinegar
1/3 cup of water
salt and pepper

Butchering the rabbit

We've had rabbit before, but only in restaurants, and we've certainly never butchered our own little bunnies. So this was an adventure. Armed with some instructions in hand, I set off to butcher the little guy. I was intimidated for sure after seeing how many steps were involved, but it actually was not that difficult. If you can buy a whole rabbit, pre-butchered, it would save you some time, but there is something cool and primal about doing it yourself. Because the rabbits were small, I found a paring knife and kitchen shears worked best.

Removing the front legs:

Removing the belly, aka rabbit bacon!

Remove the silver skin

More belly:

Hind legs on the left, tenderloins on the right (cut into two sections):


So for the recipe....

Heat 4 Tbs of olive oil in a dutch oven over medium-high heat. Dry, then salt and pepper the meat. Brown the pieces of rabbit, about 7 minutes per side, then remove from the oil.


Front legs (top left), ribs (top right), tenderloins (middle right), rabbit belly (bottom right), hind legs (bottom left):


Add the other 2 Tbs of oil and saute onions until soft. Then add everything else- the potatoes, bell pepper, tomato, olives, celery, capers, garlic, and thyme... cook 5 minutes. Mix in vinegar and 1/4 cup water. Then, add the rabbit back and reduce heat to medium-low and cover. Simmer for 30 minutes, stirring every now and then.


Serve with bread:

Really delicious. The vinegar adds this sweet and sour element that works really well with the capers and onions.

Chili fest March 17, 2011

I believe this to be the 13th annual Chili fest celebration. The first chili fest was in Berkeley and it was just me and my buddy Hajir, a pot of chili, beer, and a full day of basketball. At its peak we had 30 people, some flying in and it really became a big event. How could it not. Chili, beer, basketball, taking off work on a Thursday. This is the first time we're holding it in Lexington. Excited to build a new tradition here.

The Chili (we often double this---why wouldn't you want leftover chili)

2 pounds ground chuck (you want some fat content)
1/2 cup chopped onion
1 green pepper
1 tsp chopped garlic
1 tbsp salt
1 6oz can tomato paste
2 cups Dr. Pepper
1 can Tomato soup
1/2 cup water
2 tbsp chili powder (or more)
1 tbsp paprika
1/2 tsp oregano
1 tsp pepper
2 cups kidney beans (drained)

Preparation. Brown the ground beef. Drain. Add to a large pot with the rest of the ingredients. Bring to boil. Simmer for at least an hour.


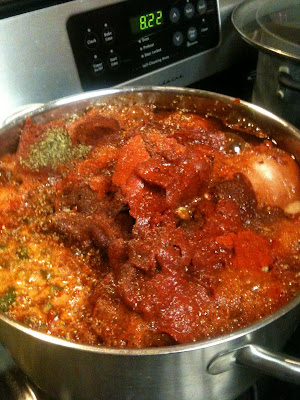
We serve it with:

Fritos
chopped onions
sour cream
sliced jalapenos
cheese
hot sauce


Better than I thought it would be


Kevin wins the award for coming the furthest distance for chili fest


Andrea ready for a Kentucky win!

Chapati bread

This is the bread we usually make with Indian. Its very quick and easy unlike Naan that takes 8 hours.

Ingredients

2 cups chapati flour, pastry-grind durum wheat flour, or all purpose white flour.
1/2 teaspoon salt
2 tablespoons oil
3/4 to 1 cup water
flour for dusting
melted butter or oil for brushing on cooked bread

Preparation

1. Mix all the ingredients except water in a large bowl or baking pan. Add water gradually, working it into the flour, mixing and kneading. Do not use all the water at once; add it gradually and use only what is necessary. Knead the dough well until it s supple and elastic. The exact quantity of water will vary depending on the type of flour used. Form dough into a flattened ball and cover it with a damp towel.


2. Heat a griddle on high. Turn the heat down to medium once the griddle is hot.

3. Divide the dough into eight to ten portions and form each portion into a small round ball. Flatten balls, dust with a little flour and with a rolling pin, roll them out on a flat surface in a circle about 1/16 inch think.


4. Bake rolled out chapatis on the griddle for about 30-40 seconds on each side; then, holding chapatis with a pair of tongs, place each on gas burner over a high flame for a few seconds on each side. The chapatis will puff up and have golden brown spots. Brush chapatis with a small amount of butter or oil before serving.


Saturday, March 12, 2011

Alu Aur Sem Ki Fali (Green Beans with Potatoes)


We've made this several times as a side dish for our Indian dinners. Very simple to make.

Ingredients (serves 6)

3 tablespoons oil
6 to 8 cloves garlic, peeled and chopped
1 pound green beans, ends trimmed, cut in 2-inch pieces
1 large potato, peeled, halved and cut in 1/8-inch-think slices
1 teaspoon turmeric
3 teaspoons coriander powder
1 teaspoon paprika
1/2 to 2 teaspoons hot chile pepper powder
1 teaspoon mango powder (we substituted mango chutney)
1 teaspoon salt

1. Heat the oil in a medium or large saucepan or saute pan. Saute chopped garlic for about 15 seconds or until slightly brown.


2. Add beans and potato slices. Stir and saute for 10 to 12 minutes.


3. Add remaining ingredients. Mix and cook, uncovered, over medium-high heat for 5 to 10 minutes, until beans and potatoes are cooked. Stir every 2 to 3 minutes.

Potstickers


I adapted this recipe from Fine Cooking magazine, which I really like. The original recipe had both pork and shrimp in them, if you care to try it.

Makes about 60 potstickers (see instruction below for freezing leftovers)

Potsticker ingredients:
2 cups of finely chopped napa cabbage
20 oz. ground pork
3 scallions, chopped
3 cloves of garlic, chopped
2 Tbs Chinese rice wine
1.5 Tbs grated ginger
1 Tbs soy sauce
1 tsp sesame oil
1/2 tsp sugar
salt and pepper
package of wonton wrappers (the circles, not the squares)

oil for frying

Dipping sauce:
3 Tbs soy sauce
1 Tbs rice vinegar
1 tsp sugar
1/2 tsp sesame oil
1 scallion, thinly sliced


First, salt the sliced cabbage to pull some of the moisture out of it. Cover with a clean towel and set aside for 30 minutes. Then ring the cabbage dry using the towel. Reserve for the pork mixture.


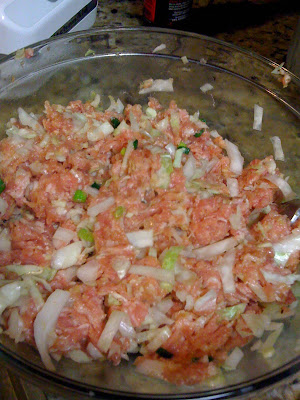
Add the pork, garlic, ginger, scallions, Chinese rice wine, soy sauce, sesame oil, sugar, salt and pepper.


Mix together.

Add the cabbage to the pork.


Stuff the wonton wrappers with the pork mixture, using a fork and your fingers. Seal each wonton with some warm water. Do not overstuff.


Heat 2 tbs of oil in a frying pan over medium-high heat. Add potstickers

Fry for a few minutes on each side to brown them.


Then add 1/2 cup to 3/4 of water (enough to cover the bottom of the pan but not drown the potstickers) and cover. Steam until all the water is gone. Remove lid for 30 seconds and then pull the potstickers.

Note**** If you want to freeze the leftovers (they keep for several weeks, though I haven't tested this cause we finish them quickly), you have to freeze the potstickers individually. You can't just throw them all in a freezer bag, or they stick together as they freeze and they disintegrate when you defrost them. I lay them out so they don't touch on a cookie sheet and put the cookie sheet in the freezer. After they have frozen completely, THEN you can put them all in a bag together.


Awesomeness.


Cochinita Pibil, Pickled Red Onions

Hello foodie friends, guest bloggers from the fine nuclear weapons free zone of Iowa City, IA checking in on AtWaiOK (or however else you care to abbreviate it).

We had a little dinner party with some of our classmates from grad school and thought that we would share a couple of our dishes with the faithful and devoted readership.

We will cover dessert, a spiced carrot cake with white chocolate cream cheese frosting in a future post. In the meantime, we're hoping that you might find some inspiration via our main course for the night, a slow-cooker adaptation of a traditional pork dish from Mexico's Yucatan peninsula, Cochinita Pibil.

Extremely devote foodies may recognize the dish as a favorite of Rick Bayless that is frequently featured on the menu at Frontera Grill and has been prepared in several permutations on his PBS show, Mexico: One Plate at a Time, as well as on Top Chef: Masters. In its most traditional preparation, Cochinita Pibil is prepared by cooking an entire suckling pig in a deep, brick-lined pit over an entire day's time. However, since we have neither a backyard nor a readily available suckling pig, we've created a fusion of several recipes from the web to craft a reliable and delicious slow-cooker method. The beauty of this recipe is that it is both intensely flavorful and an extraordinarily cheap way to feed an army.

Recipe:

One Pork Shoulder, roughly 3-4 lbs.
1/2 cup + one splash of sour orange juice
1/2 a brick of achiote
1 white onion
Kosher salt
Banana leaves

Achiote, sour orange juice, and banana leaves should all be available at your trusty local mexican grocer and should cost less than 10 dollars, total:

Achiote:

Sour Orange:
Banana Leaves:
Bust out your slow cooker and defrost the banana leaves. Trim the leaves and criss-cross them in the slow cooker, as pictured below. You'll be using them to wrap the pork shoulder.


Combine the orange juice, achiote, and about 2 tsp of salt in a bowl and mix to create a marinade.

Put your pork shoulder in the slow cooker and pour the marinade over the shoulder, using your hands to make sure that it is rubbed all over the pork (wear gloves - achiote stains!!). Add water to the sides of the slow cooker so that it rises roughly halfway up the sides of the pork shoulder (about 1/2 a cup in ours).


Fold the banana leaves to wrap the pork as tightly as possible. What you are looking for here is to keep the flavors sealed in as much as possible and to intensify the braising action of the slow cooker. This is, however, an inexact science and not one that you should get too worried about. This dish is (nearly) impossible to mess up.


Set your slow cooker for six hours on the low setting and go do something else for a while.

Once the pork is fall-apart tender (160 degrees is a good benchmark for done), remove it from the slow cooker and shred it. Have your trusty kitchen partner/sous chef/roommate/whomever skim some (but not all) of the fat from the liquid that remains, transfer it to a saucepan and reduce it to a consistency of your choosing (I typically reduce it by about half). Mix, and enjoy!!

Tandoori Chicken Breasts in Creamy Curry Sauce


We've been doing a bit of Indian cooking out of the Ajanta cookbook, which you should buy (really, its awesome, click at the bottom of our post). Ajanta is one of our favorite Indian restaurants in the East Bay.

Ingredients (Serves 6)

Tandoori Chicken

2 lemons
3 teaspoons salt
6 chicken breasts, boned and skinned

Marinade

2 shallots, minced
1 cup yogurt
8 to 10 cloves garlic, minced
2-inch piece ginger, minced
3 teaspoons paprika
1 teaspoon garam masala
1.5 tablespoon oil

Makhanwala sauce

2 tablespoons oil
6 cloves garlic, chopped
2 inch piece ginger, chopped
9 medium tomatoes, pureed
1 green chile, stem removed, chopped
1 tablespoon dried fenugreek herb
2 teaspoons salt
2 teaspoons turmeric
4 teaspoons paprika
1/2 to 2 teaspoons hot chili powder
2 teaspoons cumin powder
1/2 cup yogurt
3/4 cup heavy cream
2 teaspoons Garam Masala

Preparation


Tandoori Chicken:
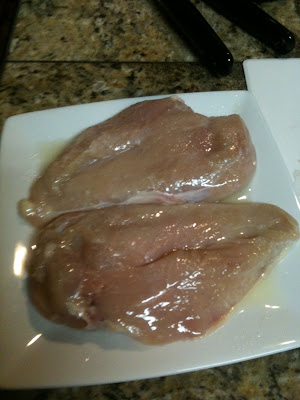
1. Cut lemons in half. Place 2 teaspoons salt on a shallow plate. Dip 1/2 lemon in salt; squeeze the lemon applying juice and salt to the chicken breasts. Continue until all the chicken breasts are covered with salt and lemon juice. Set aside for about 30 minutes.


2. Prepare marinade by mixing together all of the ingredients. Generously coat the chicken breasts with marinade and refrigerate 24 hours or overnight. Bring to room temperature before cooking.


3. Preheat broiler in the oven. Place marinated chicken on roasting rack so the chicken is exposed to the heat from all sides. Place the rack in the oven about 8 inches below the broiler. Place aluminum foil under the rack to catch the drippings. Broil the chicken for 8 minutes. Turn over the breasts and broil on the other side for 5 minutes. It is okay of the breasts are slightly undercooked at this time since they will simmer in the Makhanwala sauce later. Allow to cook and then cut each breast into four pieces.


Makhanwala Sauce:

1. Heat the oil in a 6 to 8 quart saucepot. When hot, add garlic and ginger. Oil should be so hot that ginger and garlic sizzle when added. Saute for about 10 seconds.

2. Add pureed tomatoes, green chile pepper, fenugreek herb, salt and all the spices except garam masala. Simmer, partially covered, over low to medium heat until the sauce becomes quite think. Whisk in yogurt and cream.


Putting it all together:

Add chicken breasts and simmer, uncovered, over low to medium heat for 10 minutes. Add Garam Masala and cook 2 minutes or more. Check to see that the chicken is cooked through and tender. When done, the sauce should be thick enough to coat the back of a spoon, about the consistency of buttermilk. If the sauce is too thick, add some water during cooking. If the sauce is too thin, remove all the chicken with a slotted spoon and reduce the sauce by boiling until it reaches the desired consistency. Return chicken to the pan.


***We served this dish with rice, Alu Aur Sem Ki Fali (Green Beans with Potatoes), and chapati bread.